
 So you've decided to set up a Facebook page for your company. You've heard that 52% of all marketers have found a customer via Facebook in 2013 -- and you want to join in on the fun. But, if you're going to slap together a Facebook page and expect leads and customers to roll in, you've got another thing coming.
The chances of actually joining in on that customer-generation fun is much slimmer if you're not creating a Facebook Page that gets noticed, liked, and engaged with.
Don't waste your time setting up a Facebook Page that's not going to deliver the results you want. Instead, check out the tips below to create a Facebook Page that won't suck.
1) Don't create a dummy personal account for your business' Facebook Page.
This is probably the biggest mistake I hear out there -- people create a "dummy" personal account (like Holly HubSpot) to create a brand page (like HubSpot). People do this to make sure that employees don't abuse the ability to have a Page connected to a personal Facebook account or simply to ensure that people aren't posting things on the business Page that should have been posted on their personal page. Creating dummy personal accounts goes against Facebook's terms of service, which means that your Facebook business Page could get shutdown at any moment.
Avoid Facebook shutdowns by empowering your employees to connect to your business Page via their personal account and then be sure to give them adequate training so they aren't confused about where they should be hitting publish.
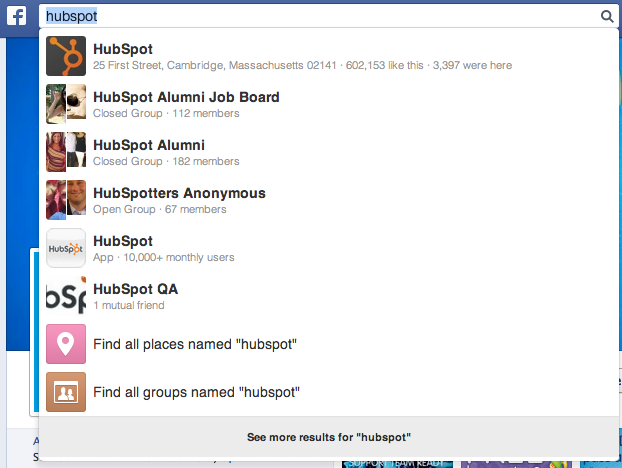
2) Pick the right Profile Picture.
You want a profile picture that's easily recognizable by your potential Fans. That could be anything from a company logo for a big brand to a headshot of yourself if you're a solopreneur or consultant. Being recognizable is important to getting found and liked -- especially through Graph Search:
When choosing a photo, make sure it'll look great in a 160 px by 160 px sizing -- though it should be uploaded in a 180 px by 180 pix box.
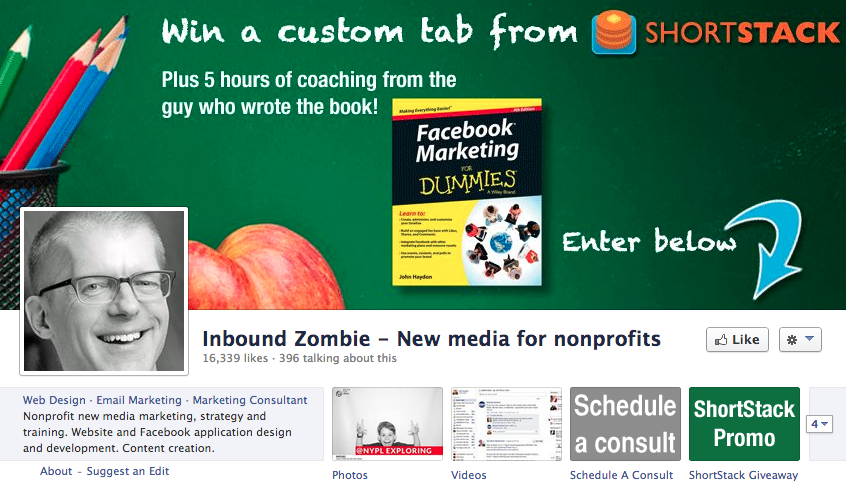
3) Choose an engaging Cover Photo.
Next, you need to pick a Cover Photo that'll blow your current and potential Fans out of the water. Since it gets the most space above the fold on your Facebook Page, make sure you're choosing one that'll be pleasing to their eyes -- and maybe even make them stay longer on your Facebook Page.
Want help picking the right Cover Photo? Check out this post about the 9 dos and don'ts of Cover Photo creation.
4) Optimize your Profile Picture and Cover Photo with links.
Depending on your goals with Facebook, you should think about including links to your website in your Profile Picture and Cover Photo. Whether it's to a blog post, a piece of lead-gen content, or just an "about us" page, links are opportunities for interested folks to get to know your company. The descriptions of your Profile Picture and Cover Photo are prime real estate for those links, as they'd be front and center on your page.
If you decide to add links to these two photos, make sure they are shortened links with UTM parameters on them -- that way, you know if they're working or not.
5) Customize your app thumbnails.
You know those four pesky boxes underneath your Cover Photo? Those are thumbnails for the apps on your page:
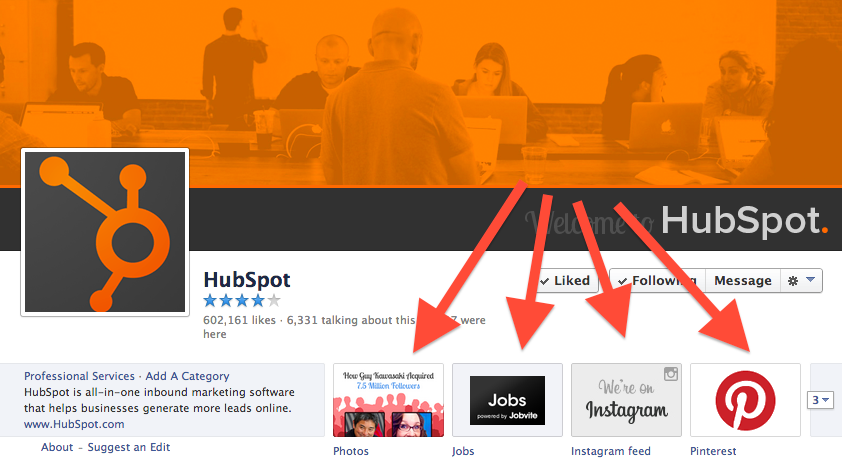
Make sure those are optimized as well. Choose the most engaging apps out of all the ones you've enabled on your page to appear in the top row. Then, try customizing the images to maximize their engagement rate. Click here to learn how to do just that.
6) Bonus: Coordinate all the elements in steps 2-5.
If you want to get extra creative and feel confident in your design skills, try coordinating all three elements. Get their sizing information here, then figure out a creative way to make them fit together. Maybe make your Profile Picture be a part of the Cover Photo design:
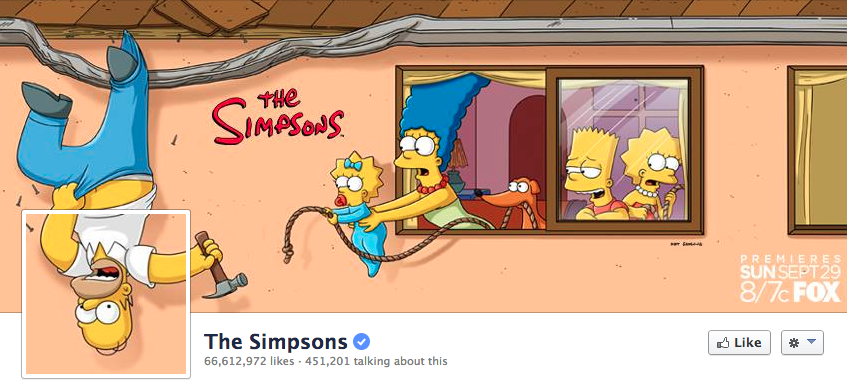
Or use your Cover Photo to point to some of the apps you'd like your Fans to use:
The possibilities are endless!
7) Fill out your About section with basic information.
Amidst the visual skills you've been honing in the previous steps, don't forget about one of the most important sections of all: your About section. It sits right under your profile picture on the left side -- one of the first places people will look if they're scanning your page.
So be sure to get people's attention with short yet descriptive copy -- by doing so, new Fans will know exactly what your page is about before they like you.
8) Decide whether you want messages on or off.
If you want your Facebook Fans to be able to message you directly on your Page, definitely enable the Messages feature -- but make sure you have the bandwidth to monitor your Facebook Page inbox.
We recommend making it as easy as possible for your Fans to reach out to you by enabling Messages -- but only if you have the time dedicated to do so. If you can't dedicate resources to checking your Messages inbox, make it very clear in your "About" snippet the most direct way to get in touch with you ... and then, of course, actually respond to those inquiries from your Fans.
9) Figure out the timing of your posts.
Before you post a single thing to your Facebook page, take a second to think about your posting strategy. When are you going to post? Morning? Afternoon? Night? And how often will you be posting? Once a day? More often?
This is all important to think about because it will affect how successful your Page is in the long run. While posting multiple times a day can be a strategic way to land in the News Feed, you might end up shooting yourself in the foot like this business Page:
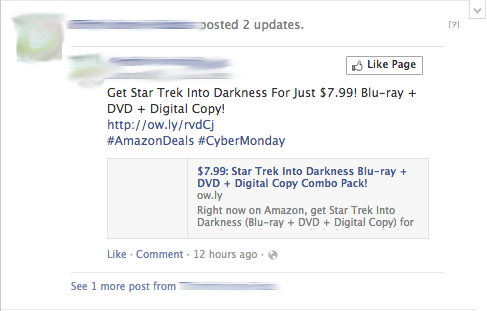
Because the Page had too many updates in a set timeframe, Facebook's algorithm grouped them together, rendering the hidden post near-useless. Prevent this from happening by thinking about when your audience will be on Facebook (and verify that with Facebook Insights) and then tailoring your posting strategy accordingly.
10) Post pictures on your wall first.
Why focus on posting pictures first? Well, there are two reasons: 1) You need to make sure your "photos" app (an automatic app added to your page) actually has a photo in it, and 2) photos have been proven to be more engaging to Fans than the average post.
So, maximize your Facebook juice right from the start with them! Make sure they're the correct size as well by checking out this social media image sizes infographic.
11) Don't get comfy: Switch up your post formats after that.
If you continue to post picture after picture, you may see your reach and engagement go down. Why? While it's the most engaging post format, too much of a good thing is bad for your Facebook Page. So try switching up the post formats to increase the chance your audience sees them.
In other formats, make sure that your content is optimized for that post format. Case in point: Don't post a link that has a poor featured image. Since links now pull in large featured images on Facebook, you've got to make sure that featured image actually works and looks okay. Otherwise, your Fans will see something wonky and, most likely, won't click on it, which kinda defeats the whole purpose of posting that link in the first place. So make sure each post format is correctly formatted for the platform.
12) Promote lead-gen and non-lead-gen content.
Even if your goal is to generate leads from Facebook, you don't want to make every post a photo of an ebook with accompanying copy that says "Download this ebook here: http://link.com" Instead, switch up lead-gen posts and fluffy, engagement-only posts -- you'll get more people interacting with you (and that means you'll have a better chance of being shown in the News Feed later on) and grow your Fan base. That way, when you do have lead-gen content, you'll have a much bigger audience available to click on your links.
Bonus tip: For all content that has links in it, be sure to place the link before the end of the fifth line of text -- that's where it will truncate and include a "see more" tag. That way, your Fans don't have to click "see more" to access your call-to-action.
13) Promote your page to get more followers.
Now that you've gotten some content up on your page, promote the heck out of it like it was a product of yours. Make sure you have social profile buttons on your website so your visitors can connect with you that way. Try embedding a Facebook Like Box in your blog sidebar. Also, be sure to alert your email lists that you're on Facebook. Without promotion, it will be much harder for your Page to grow.
14) Track your success.
Remember back in step 4 when we talked about shortened URLs? This is the step you can measure how they're performing. In your marketing analytics, you can track how many clicks those URLs are getting -- and if you have closed-loop marketing, you'll be able to attribute leads and customers who came from those URLs. Pretty sweet, right?
Besides your bottom-line metrics, you should also dive into Facebook Insights to find Facebook-specific engagement metrics. You'll be able to see the demographics of your Fans and, if you have more than 30 Likes, the demographics of the people who engage with you, among other things.
Use Facebook Insights to check out some cool data that'll help shape your non-lead-gen content.
15) Dabble in ads to amplify what works.
So you know what works for your lead-gen and non-lead-gen content now -- that means you should put some ammo behind future posts that'll have those characteristics so they can be even more successful.
Putting a little bit of your budget in Facebook ads can go a long way, if you're basing them off of the right insights. Need help with your Facebook Ad strategy? This ebook can help.
If you're following along with all of these tips, you're going to have a much better chance of succeeding with the platform. So go on and get your Facebook Page up and rocking!